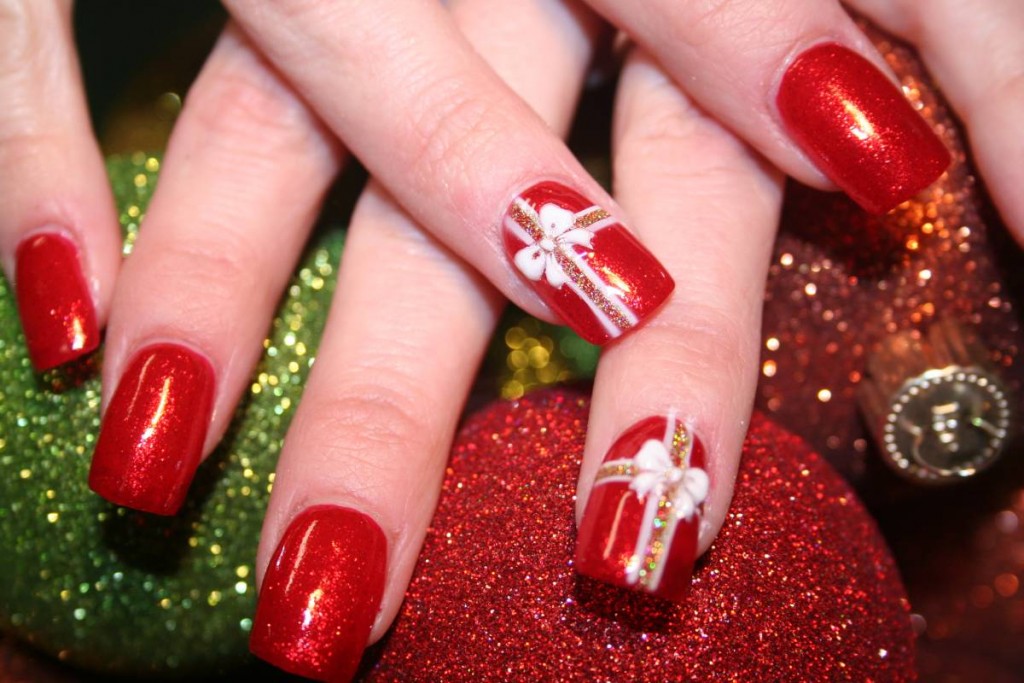
With Christmas just around the corner, lots of ideas to choose from all the different styles of nail arts seem like a good idea, below is a compilation of some lovely nail art patterns that would rock with your Christmas outfits. You can take your pick from these.
Easy Nail Art Designs for This Christmas:
Christmas Nail Art Design #1

All the nails have been painted in a matte Maroon Coloured base coat. However, the motifs on each nail have been done differently since you want precise geometric shapes, it is best to do it with the help of an Opaque White nail art own that dispenses the colour as fine lines. Use the nail art own after your base colour has dried completely. After your motifs have dried, you can seal your nail art with a clear nail paint. This prevents chipping of nail colour and prolongs your nail art.
Christmas Nail Art Design #2

This is a good example of Christmas themed nail art. This style where one or two nails are styled differently from the others is called as Accent nail art. Three of the nails are done with scattered polka dots. These dots are best made using dotter tools of different sizes. Alternatively, you can use the back of a bobby pin by dipping it in nail paint. Two of the nails have an additional snowflake pattern that can be drawn by using either a nail art pen or a fine nail art brush.
Christmas Nail Art Design #3

Start by painting your nails in a matte finish shade of Red. Let the base colour dry completely before proceeding to the next step which is using a White Nail art pen with a fine tip to draw the various patterns on your nails. Practice drawing each pattern two to three times before finally drawing it on your nails. After your motifs have dried, seal with a clear polish. All nails now have different Christmas themed designs.
Christmas Nail Art Design #4

This nail art looks really bright. The base coat is a nude hue. On top of it, towards the centre of the nail, glittery- confetti nail paint has been deposited in a perfect circle shape. You can use a stencil for this. Once the glitter dries, add the stem and leaf motif with a Black coloured nail art pen. You can also add a Rhinestone, if you wish to. Seal everything with a clear Polish, once dried.
Christmas Nail Art Design #5

To achieve this nail art at it’s best you need to first of all, paint all your nails in a glittery Golden shade. The shimmer particles add to the beauty of this nail art, after, the base colour has dried completely. You can paint the ribbons of the bow by drawing two horizontal and two vertical lines across your nail. Try to Keep the orientation of the lines as close as possible to that depicted in the picture. For the bow, you can use readymade nail art sticker. In the space between lines, you can fill the space with help of a glitter nail art pen.
Christmas Nail Art Design #6

Santa’s cap nail art looks very nice and can be done just right with a little practice. Paint the edge of your nails in opaque White colour. This forms the base of your hat. Use a Black nail art marker to draw the shape if your Santa’s cap. Fill in the colours with help of a fine nail art brush and Bright Red nail paint. Shading in Black can also be done with a brush.
Christmas Nail Art Design #7

This one has three nails painted in a similar pattern. You can use a dotter tool for the polka dots and a nail art own for drawing the zigzag line across the width of nails. For the snowflake, practice a bit before hand on a paper or something. You shall be able to draw the diamond shaped petals if the snowflake. The Reindeer is a bit tricky but can be made with help of a stencil.
Christmas Nail Art Design #8

This is an Interesting one with different parts of Santa painted on different nails and then when you align your nails vertically, the whole Santa pops out. Cap, face, jacket and lowers of Santa come on four separate nails. You just need to have some basic drawing skills to achieve this effect. Red and Whites nail paint along with a basic set of nail art pens should do the job for you.
Christmas Nail Art Design #9

Another accent nail art where KBE nail has been painted with a snowman and the others have been adorned with a Christmas tree motif. The designs have been kept very basic and even somebody with a not so precise hand can do it. Use your dotter tools, fine tipped brushes and nail art markers for this. For the top of your Christmas trees, use a Rhinestone. The Stud needs to be put very precisely after applying adhesive with the help of tweezers.
Christmas Nail Art Design #10

The frosted appearance of nails in this design looks really pretty. After applying a clear base coat, the upper half of the nails has been painted with a nail paint that has White to Silver coloured shimmer particles. After, this dries, use a brush dipped in Olive Green nail paint to paint your Holly leaves and dotter tool for central Red dots.
Christmas Nail Art Design #11

If you are good at drawing and want to flaunt it on your nails, this nail art is for you. Here, one nail has been painted in a candy cane pattern while another one has a basic Santa face. Snowman nail arts are easy to do and against a Blue background, the snowman really stands out. Reindeer face looks good in shimmery colour and so does the Christmas light. The glossy, shimmery and matte finish nail paints have been wisely used to make each nail unique in its appearance.
Christmas Nail Art Design #12

This nail art depicts practically everything you can relate to Christmas theme. There is a candy cane, a Reindeer, a snowman, gingerbread man and snow. Each motif has a separate nail to stand out. The base colour is kept Red for a striking contrast. You can use glittery top coats on some nails while a clear top coat on others.
Christmas Nail Art Design #13

The icy Blue base coat gives the effect of a chilly Winter night in December. The edges have been done in White to depict snow covered streets and the polka dots give an illusion of falling snow. Combine this with a snowman figurine and the Moon and you end up creating a perfect Christmas scene on your nails. It’s so simple yet so illustrative.
Christmas Nail Art Design #14

Paint your nails in a cool hue of Blue and then use your brush/ marker to draw the geometric snowflake pattern along with the polka dots. This is super easy to do. Once, everything has dried, use the glitter polish for final touches.
Christmas Nail Art Design #15

This cheerful Christmas nail art makes use of a lot of Rhinestones, glitter polish, confetti, studs and nail art stickers on a White background. Use your tweezers for precise placement of studs and stickers.
Christmas Nail Art Design #16

Create the Christmas season on your nails using a couple of Brightly coloured shades, glitter Polish, nail art marker for filling in the details along with rhinestones.

