Nobody loves Christmas more than kids. This season help them remember the special holidays spent with family with fun and unique ornaments designed specifically for them. Customize a Christmas ornament by showing off their favorite hobbies, like karate, ballet or their sports team and number or you can choose an adorable design about which you know they’ll love, like a train or a mermaid with their names printed or engraved on the ornament.
You can never go wrong with a photo ornament of their smiling faces. Discover some personalized ornaments which will be cherished for long and someday adorn their Christmas trees.
BEST CHRISTMAS ORNAMENTS FOR KIDS
Here is the list:
Melted Crayon Ornaments:

Simply grab the broken crayons and a hair dryer to create these ornaments. Your kids are going to love and cherish them for long. Make sure to make this ornament when your child is not at home and gift it directly on the holiday eve or stuff it in the Christmas stuffer and see your child getting excited all day long.
You will need:
Clear Glass Ornaments.
Crayons.
Mini Craft Knife.
Protective Surface Cover or Newspaper.
Hair Dryer.
Embellishments.
Directions:
With protective plastic or a newspaper, prepare your area first. Even though this is a little bit less messy than other crayon crafts, you definitely won’t like your carpet or your table ending up spattered with crayon drippings!
You can start off by using a craft knife and fingernails to rip off the labels on the crayons.
From the glass ornaments, remove the stem carefully.
Cut or break small chunks of crayons and drop them in. Choose to do no more than 3-4 colors at a time, but you can always experiment with more or less.
Blast the heat on the ornament with your hair dryer setting on high. If you don’t hold the heat too long in one spot then you can handle the ornament easily. You can twirl the ornament if they drip with your hand.
Crayons might get uncontrollable sometimes but that is the beauty of this project, it creates abstract drips and you just have to go with it.
Make sure to stop before your crayon gets absolutely covered on the inside. You will like the transparent and scratch effect the crayon wax will have with the glass.
Shake or heat the crayons up so they will go out the opening when you are satisfied.
And that is it! You can now add a bow or sparkle to the outside as per your wish.
These would be pretty on a gift, on a Christmas tree, or in a glass bowl for a pretty display!
DIY Silhouette Christmas Ornament for Kids:

The homemade silhouette Christmas ornament is super easy to create which makes it a special keepsake. The simple ornament is definitely worth making for your child and your older kids can even make their own. The homemade Christmas tree ornaments make wonderful homemade gifts. It would also make a special gift to give to your grandparents and other family members.
Materials you will need for Silhouette Christmas Ornament Craft:
Shrink film. (You can use a Matte Shrink Film).
Black Sharpie.
Scissors.
Single Hole Punch (This Hole punch is a life saver for your hands!).
Thin, Red Ribbon or Yarn.
Photo of your Child.
Directions for Silhouette Christmas Ornament Craft:
Find or take a picture of your child’s profile and get its print out on white paper using a printer.
Over the photo place a sheet of shrink film. (To really make the silhouette stand out on the white background you can use matte shrink film).
With a Sharpie, trace the outline of your child’s face and color it. Near the drawing, write the name of your child and year.
From the shrink film, cut out your profile drawing and punch a hole on the top of the film.
On a cookie sheet covered with parchment paper, place your shrink film drawing and according to the directions on your shrink film’s package, bake it. (It usually takes around 3 minutes at 335 degrees.)
Press it down flat with a spatula, once it shrinks completely and before it hardens completely.
Allow it to cool. Tie a red ribbon through the hole for hanging and you are good to go.
Scrap Ribbon Christmas Tree Ornament:
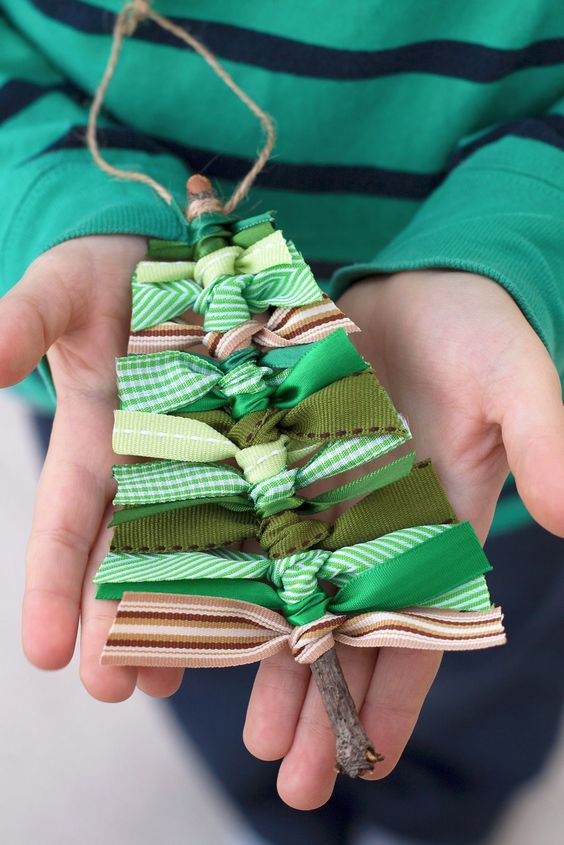
Making a primitive scrap ribbon Christmas tree ornament will be enjoyed by the crafters of all ages in order to gift or keep it with themselves this holiday season. In the post, learn how to use shades of green and brown scrap ribbon to emulate the welcoming branches of a Christmas tree.
You will need:
Straight Sticks or Cinnamon Sticks of 6-inch.
Ribbons.
Hot Glue Gun.
Twine.
Scissors.
Directions:
Help your kids to tie the scraps of ribbon down the twig or cinnamon stick once you have collected all the things which are needed.
Bunch the ribbons close together for best results. This will bend and slightly overlap the ribbons. Tug them gently into place until you are satisfied with their placement.
To trim the ribbon scraps into the shape of a Christmas tree, use a sharp scissor.
With a match, melt the edges of the ribbons so the ribbon doesn’t fray.
To the top of the tree, hot glue or tie a loop of twine.
Top the tree with a yellow button, primitive metal star or a wooden star.
Your Scrap Ribbon Tree Ornament is complete.
Handprint Reindeer Christmas Ornament:
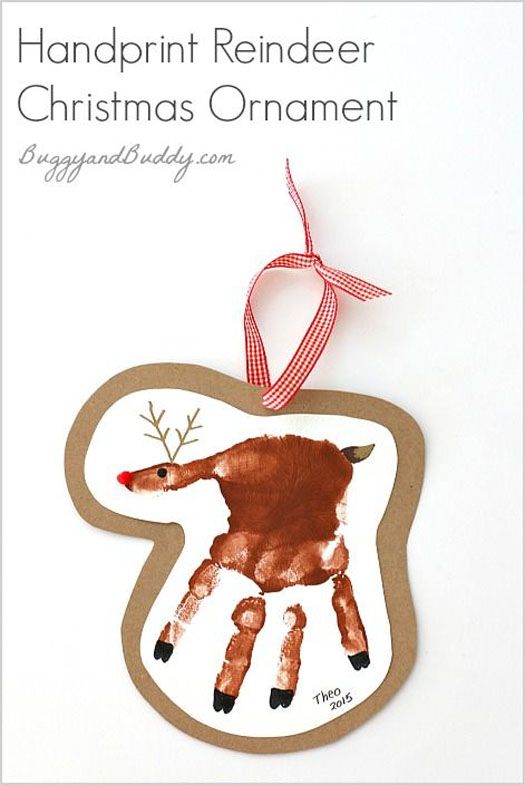
The unique and adorable handprint reindeer makes the perfect Christmas ornament. It will serve as a special gift for kids by their parents for Christmas and also a wonderful keepsake for a parent to help their child make one.
The favorite homemade Christmas ornaments is those which make a special keepsake. The hand print reindeer Christmas ornament is another way to remember how little your child once was. It will serve as a special memory each year as you decorate your Christmas tree.
You will need:
White Art Paper.
Brown Tempera Paint.
Paint Brush.
Markers.
Mini Red Pom Pom.
Glue.
Scissors.
Paper for background.
Single Hole Punch.
Ribbon.
Directions for Making Handprint Reindeer Ornament:
Using a paint brush, paint a layer of brown paint on the hands of your child.
Ask your child to spread his/her fingers apart and make a handprint onto the white art paper.
Let the handprint dry completely.
Using markers, help your child to add reindeer details to the handprint.
Help your child draw an eye, hooves, antlers, and a tail.
For the nose, glue a mini red pom pom onto your reindeer or you can simply draw a red nose using a marker.
Cut out the finished reindeer and write the name of your child and the date on the paper.
On a background paper, mount it.
Leaving a border, cut it out again and punch a hole on the top and tie a ribbon for hanging.
Santa Hat Homemade Christmas Ornament Using Craft Sticks:
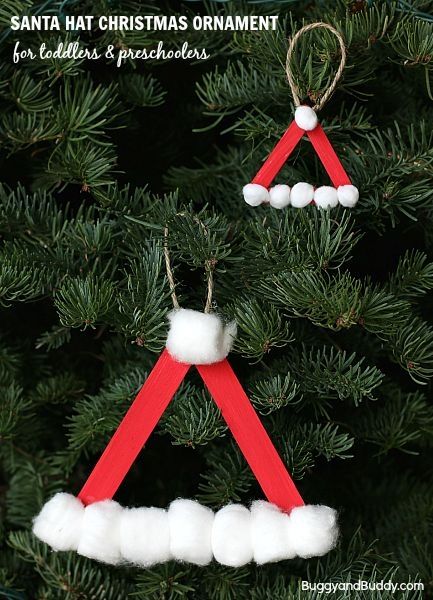
One of the most common and favorite ornament to put up on the Christmas tree by a lot of people are definitely the ones made by the kids. For the newest ornament we bring you something which is so simple that even your preschooler can mostly do on his own.
The Santa Hat ornament will surely be the best option for your kid which involves some painting and gluing – the two common things a child always loves to do.
Materials you will need for Santa Hat Ornament are:
Popsicle Sticks (You can make ornaments with jumbo popsicle sticks and some with regular popsicle sticks, and some with mini popsicle sticks).
Hot Glue Gun (Optional).
Red Tempera Paint and a Brush.
Cotton Balls.
White Pom Poms (Optional).
Liquid Glue.
String for hanging.
Directions for Making the Santa Hat Ornament:
Glue your three Popsicle sticks together to form a triangle for starting. (Use a hot glue gun so it would dry quickly).
Then paint the triangle red, and allow it to dry.
Along the bottom of the hat and right on top glue cotton balls.
To hang your ornament, tie or glue on a piece of string.
Tips:
- Try using different size of Popsicle sticks. You can use mini sticksfor some of your ornaments and instead of gluing cotton balls on them, you can glue on small white pom poms.
Handprint Santa Salt Dough Ornament:
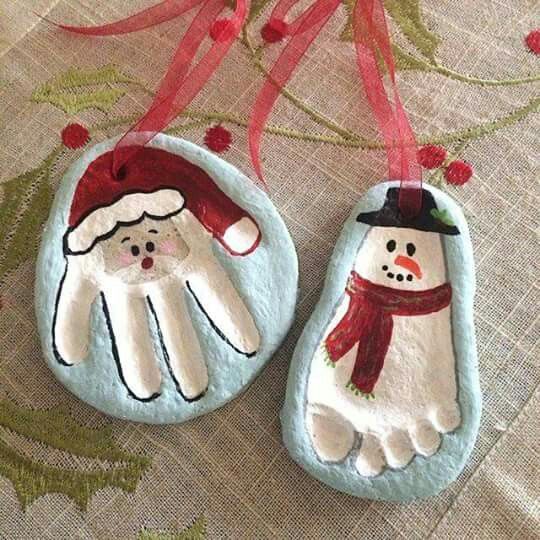
It’s time to get jolly! Well yes! Then why not make a fun and easy Handprint Santa Salt Dough Ornament with your kids!
It is a fun project for kids of all ages as hands of all ages will look cute – baby, toddler, preschooler, kindergarten kids and older!
What you will need:
1 Cup All Purpose Flour.
1/2 Cup Salt.
1/4 Cup Warm Water.
Note: Your Dough should not be sticky.
Craft Paints & Brushes.
Wax Paper.
Butter knife.
To Make your Santa, a hand of a willing participant.
Directions:
On a lightly floured surface turn the salt dough out and knead it just as you would bread dough to remove air bubbles and obtain a smooth texture.
Cut a piece of dough and roll into a ball and on the wax paper flatten to about 1/2 an inch.
All over the palm of a hand sprinkle some flour and lightly on the dough to prevent it from sticking.
Press your hands down on the dough and lift it carefully. Go around the edges and create a border with the help of a butter knife.
In the microwave, place the handprint and heat for 15 seconds, repeat the same and then heat for 20 seconds.
Continue the process until the dough starts to dry out and change color (about 6 rounds).
As long as it is starting to harden, paint the dough. It will dry and harden the rest of the dough way over night.
TIP* Paint the whole handprint white first, and then paint the face section. It makes painting all the detail much easier!
Glass Ball Character Ornaments:
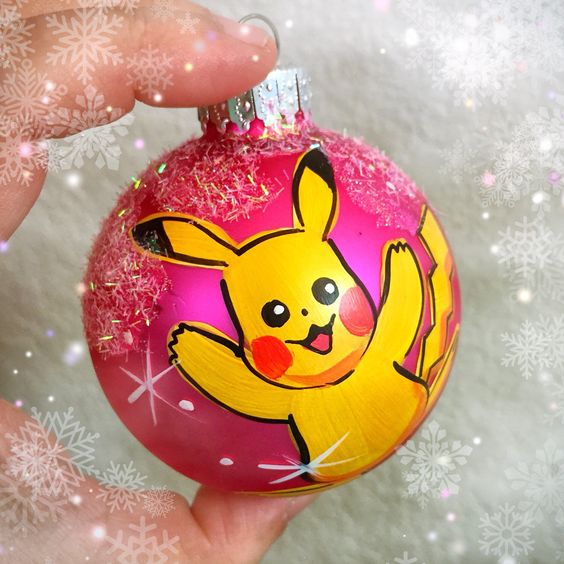
This one is sure to be a crowd-pleaser with the kids. Here is a minion Christmas ornament as well as Elmo and Mike Wazowski.
But you can make them with anybody and whoever your kids like, make them an ornament. It’s really very easy.
Supplies which you will need:
Glass Bulb Ornaments.
Multi Surface Satin in desired colors.
Vinyl (optional).
Ribbon to hang ornaments
Directions:
Pour a bunch of paint inside the ornament by taking off the top part. Make sure to be generous as it will be easier.
Over the top hole, place your thumb and shake to spread the paint. Add more as needed.
When the ornament is completely coated, turn it upside down and allow it to dry in a paper cup or in the box in which it came. Make sure that the excess paint drips out as it dries. Allow it to dry for a few hours to overnight.
Now add the face which you can do by cutting out adhesive vinyl or with paint. A combination of the two can also be considered and tried out.
The minion is entirely from vinyl. Just do whatever works best for you. The Multi Surface Satin will stick well. Which character will you make?
Bottled Up:
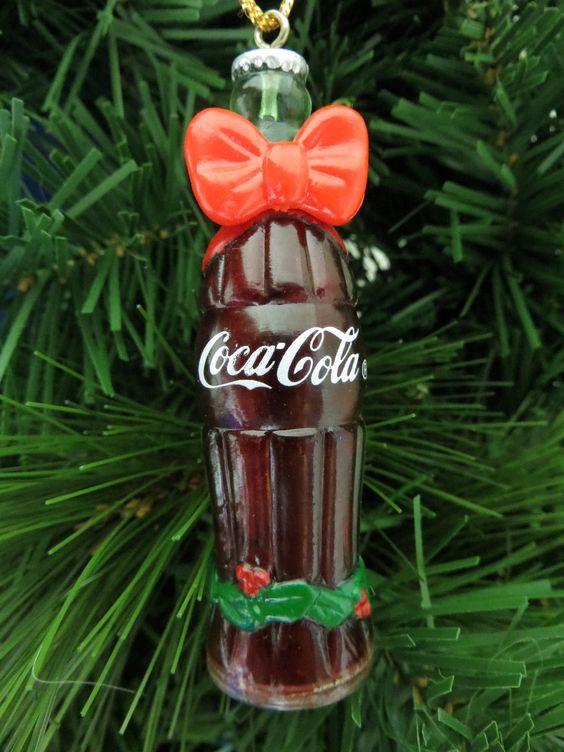
Use some left over bottle caps to use by turning them in snowman ornaments.
Things you will need for this are:
Black, Red, Orange and White Acrylic Paint.
Ribbon.
Paint Brush.
Hot Glue Gun and Glue Sticks.
Buttons.
Scissors.
Glitter and Sparkle.
Directions:
Paint the insides of each bottle cap with white color. To getting it coat completely you will need more than one coating and letting it dry in between which makes it little tricky. If you want then you can paint the outsides too of the caps.
Take a piece of ribbon and glue three bottle caps to it. Make sure to put some glue between each bottle cap so that they hold up each other together. Glue in place by creating a loop with the top of the ribbon.
To paint the nose, eyes, mouth and buttons on the snowman, use the end of a paint brush or a tooth pick. Once they get dry, add some sparkle.
Between the first and second bottle cap to make a scarf and accent it with a button, tie a ribbon or a yarn, if you like.
Cinnamon Spice:
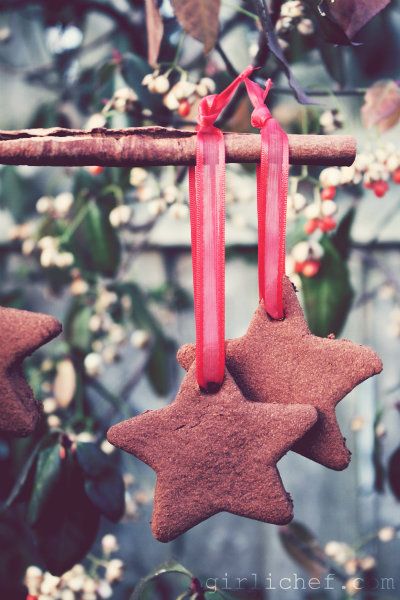
You will need some Cinnamon sticks to make these DIY decorations to make some spicy addition to your Christmas collection. To add a pop of color, add a few buttons.
Things you will need are:
3” Cinnamon Sticks.
Assorted Buttons.
Glue Gun.
Wire Cutters.
Ruler.
Twine or Hemp Cord.
¾” Pine Garland.
Directions:
To start off you need to first prep all the materials. Plug in the glue gun and let it get warm. Using your wire cutters, cut 1”, 2” and 2 ½” pieces of Pine Garland and 7” pieces of Twine for the number of ornaments you plan to make.
Once you are done with the first part of cutting down the pieces, it’s time to start off with the assembling.
Start off by gluing the pine to the cinnamon stick by placing the shortest piece of 1” at the top then the 2’ piece which will be followed by 2 ½” piece. Once done, glue the twine to the back of the cinnamon stick.
Once done with the above process, decorate the tree ornaments.
Glue the buttons on top and on each side of the branches. Though there are endless possibilities to decorate it a little more with sequins, glitter, pom pom and much more but make sure you do not fill it up more than needed or else it will destroy the look.
Here are some of the latest ideas which you can try this season and make your kids fall in love with this holiday and remember it for long.
MERRY CHRISTMAS!!!

